

Summary
The Send webhook step sends the details of a workflow run to a URL you choose. When the workflow reaches the step, TruAgents sends one HTTPSPOST with the contact, the inbound communication, and links back to TruAgents.
Use it to hand work to systems outside TruAgents. For example, you can create a lead in your CRM, post to a team channel through Zapier or Make, or open a ticket.
You choose the destination and optional headers. The body is fixed. The Webhooks reference describes every field.
Who this is for
Admins and operators building workflows. You need the URL of a receiving endpoint. Usually a developer, or a Zapier or Make scenario, provides it.Before you start
- You can create or edit workflows (Owner, Admin, or Editor role).
- You have an
https://endpoint URL on the public internet. No-code tools generate one for you:- Zapier: a Webhooks by Zapier trigger with the Catch Hook event.
- Make: a Webhooks module with the Custom webhook trigger.
- If the endpoint expects a token, you have one that is dedicated to this webhook and unlocks nothing else. Header values are visible to everyone in your organization who can open the workflow.
Add the step
1
Open or create a workflow
Go to Workflows. Open an existing workflow, or click + Add Workflow and pick a starter. The Hot lead starter is a good base for sending sales-ready leads to a CRM.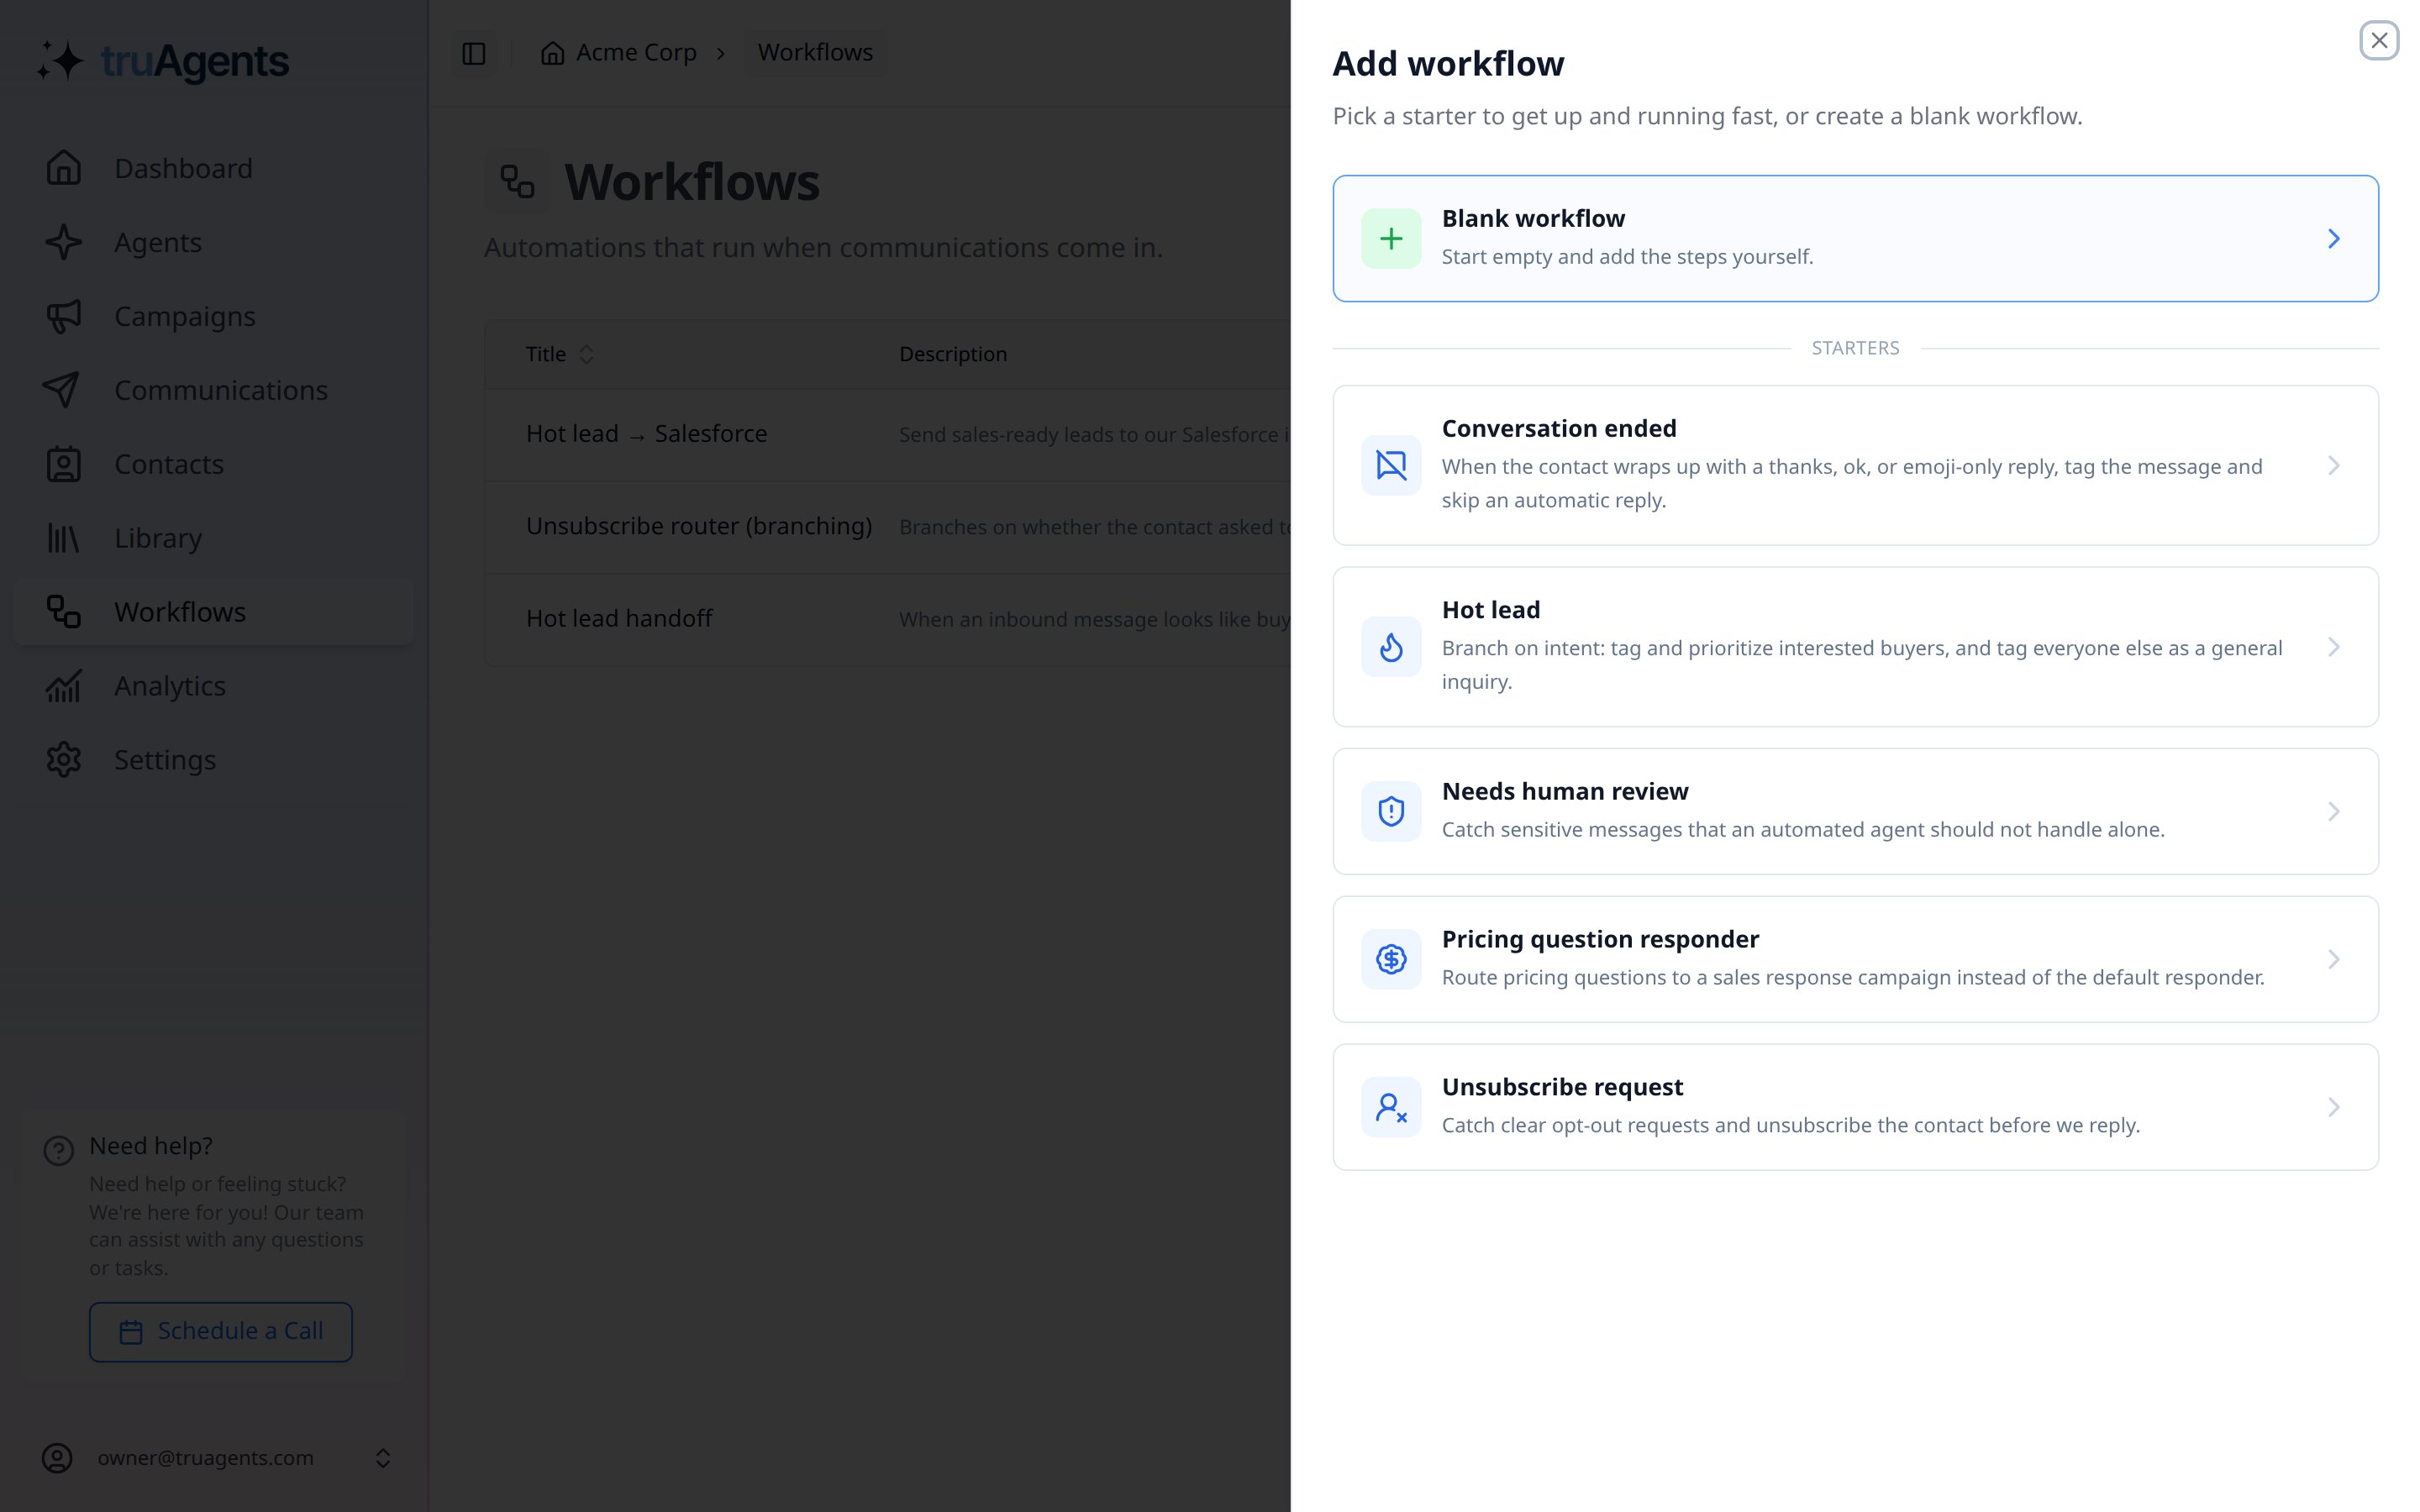
2
Decide what should trigger the webhook
Click the Look for step and describe in plain English what a match looks like. Only communications that reach the step’s branch send a webhook. Put the webhook on the MATCH branch to send only matching communications.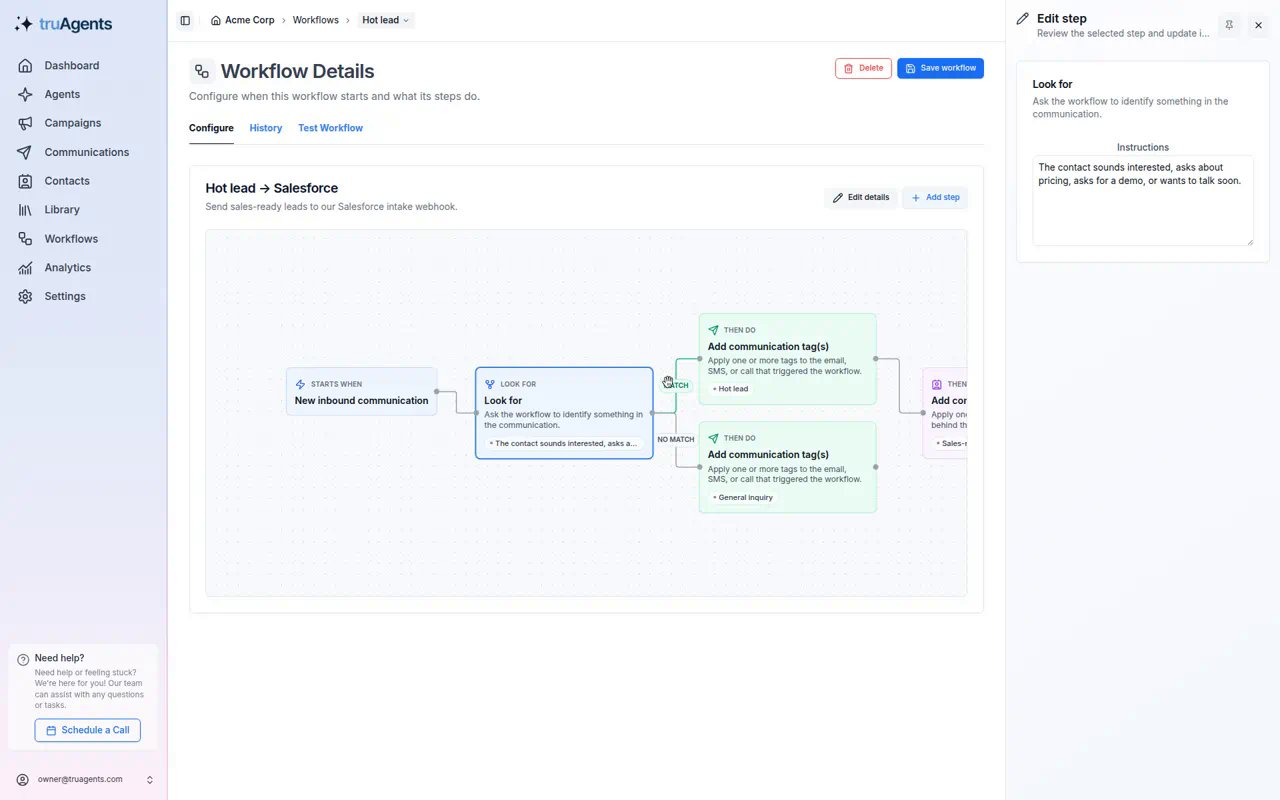
3
Add Send webhook
Click + Add step on the canvas, or the add control after the step that should come before the webhook. Under Output, choose Send webhook.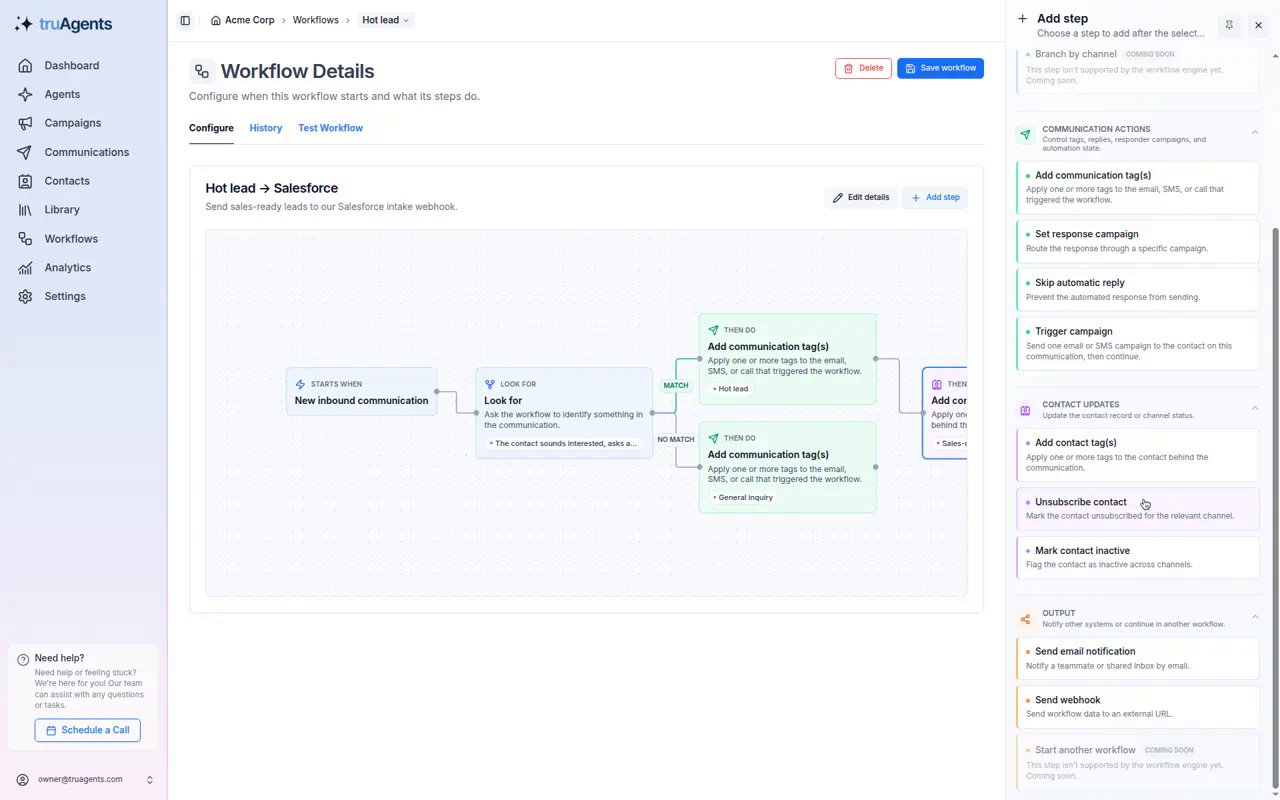
4
Configure the destination
In the Edit step panel:
-
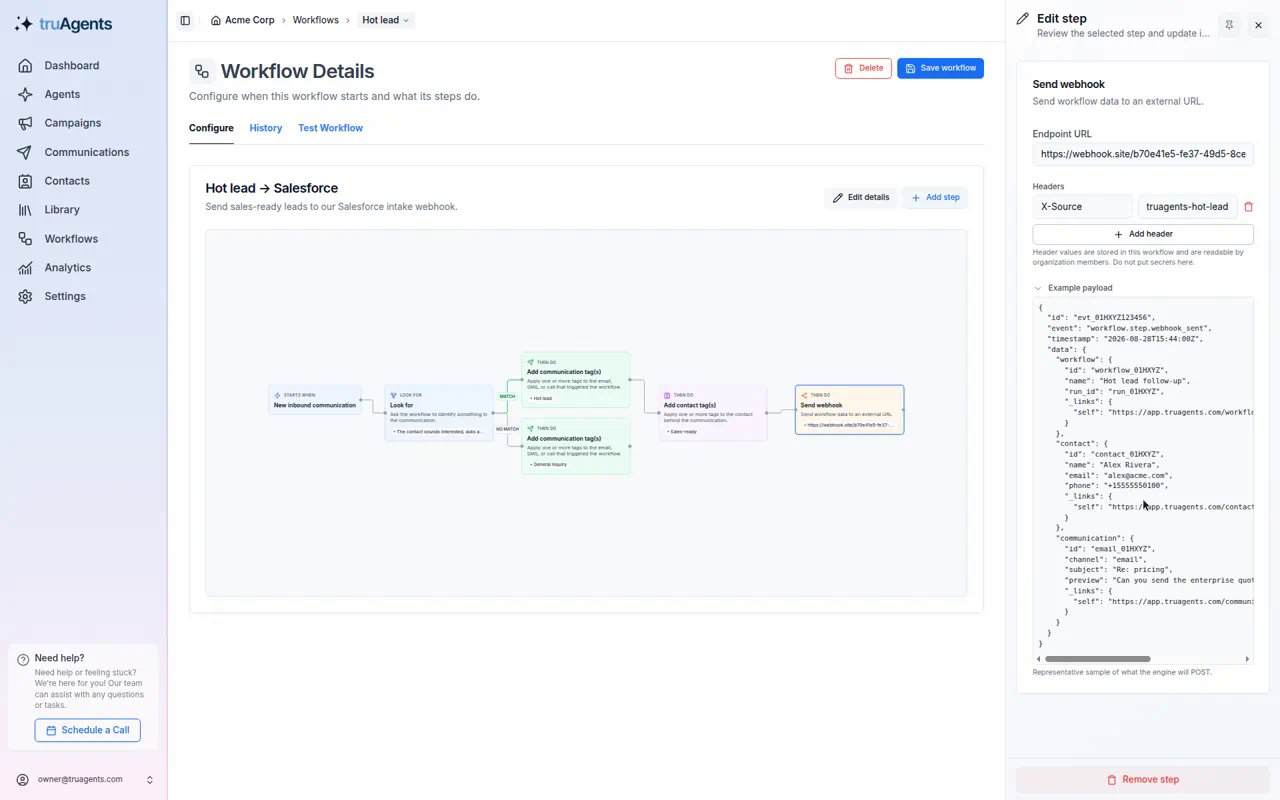
Endpoint URL: paste the
https://URL from your receiver. The field shows “Enter a valid https:// URL.” until the URL is valid. -
Headers (optional): click Add header for anything your receiver expects, such as
X-Source: truagents-hot-leador a dedicated token. LeaveContent-Typealone. TruAgents sendsapplication/json. -
Example payload: expand it to see the shape of the body. Give this sample to whoever builds the receiver.
5
Save
Click Save workflow. The step shows on the canvas with its destination host.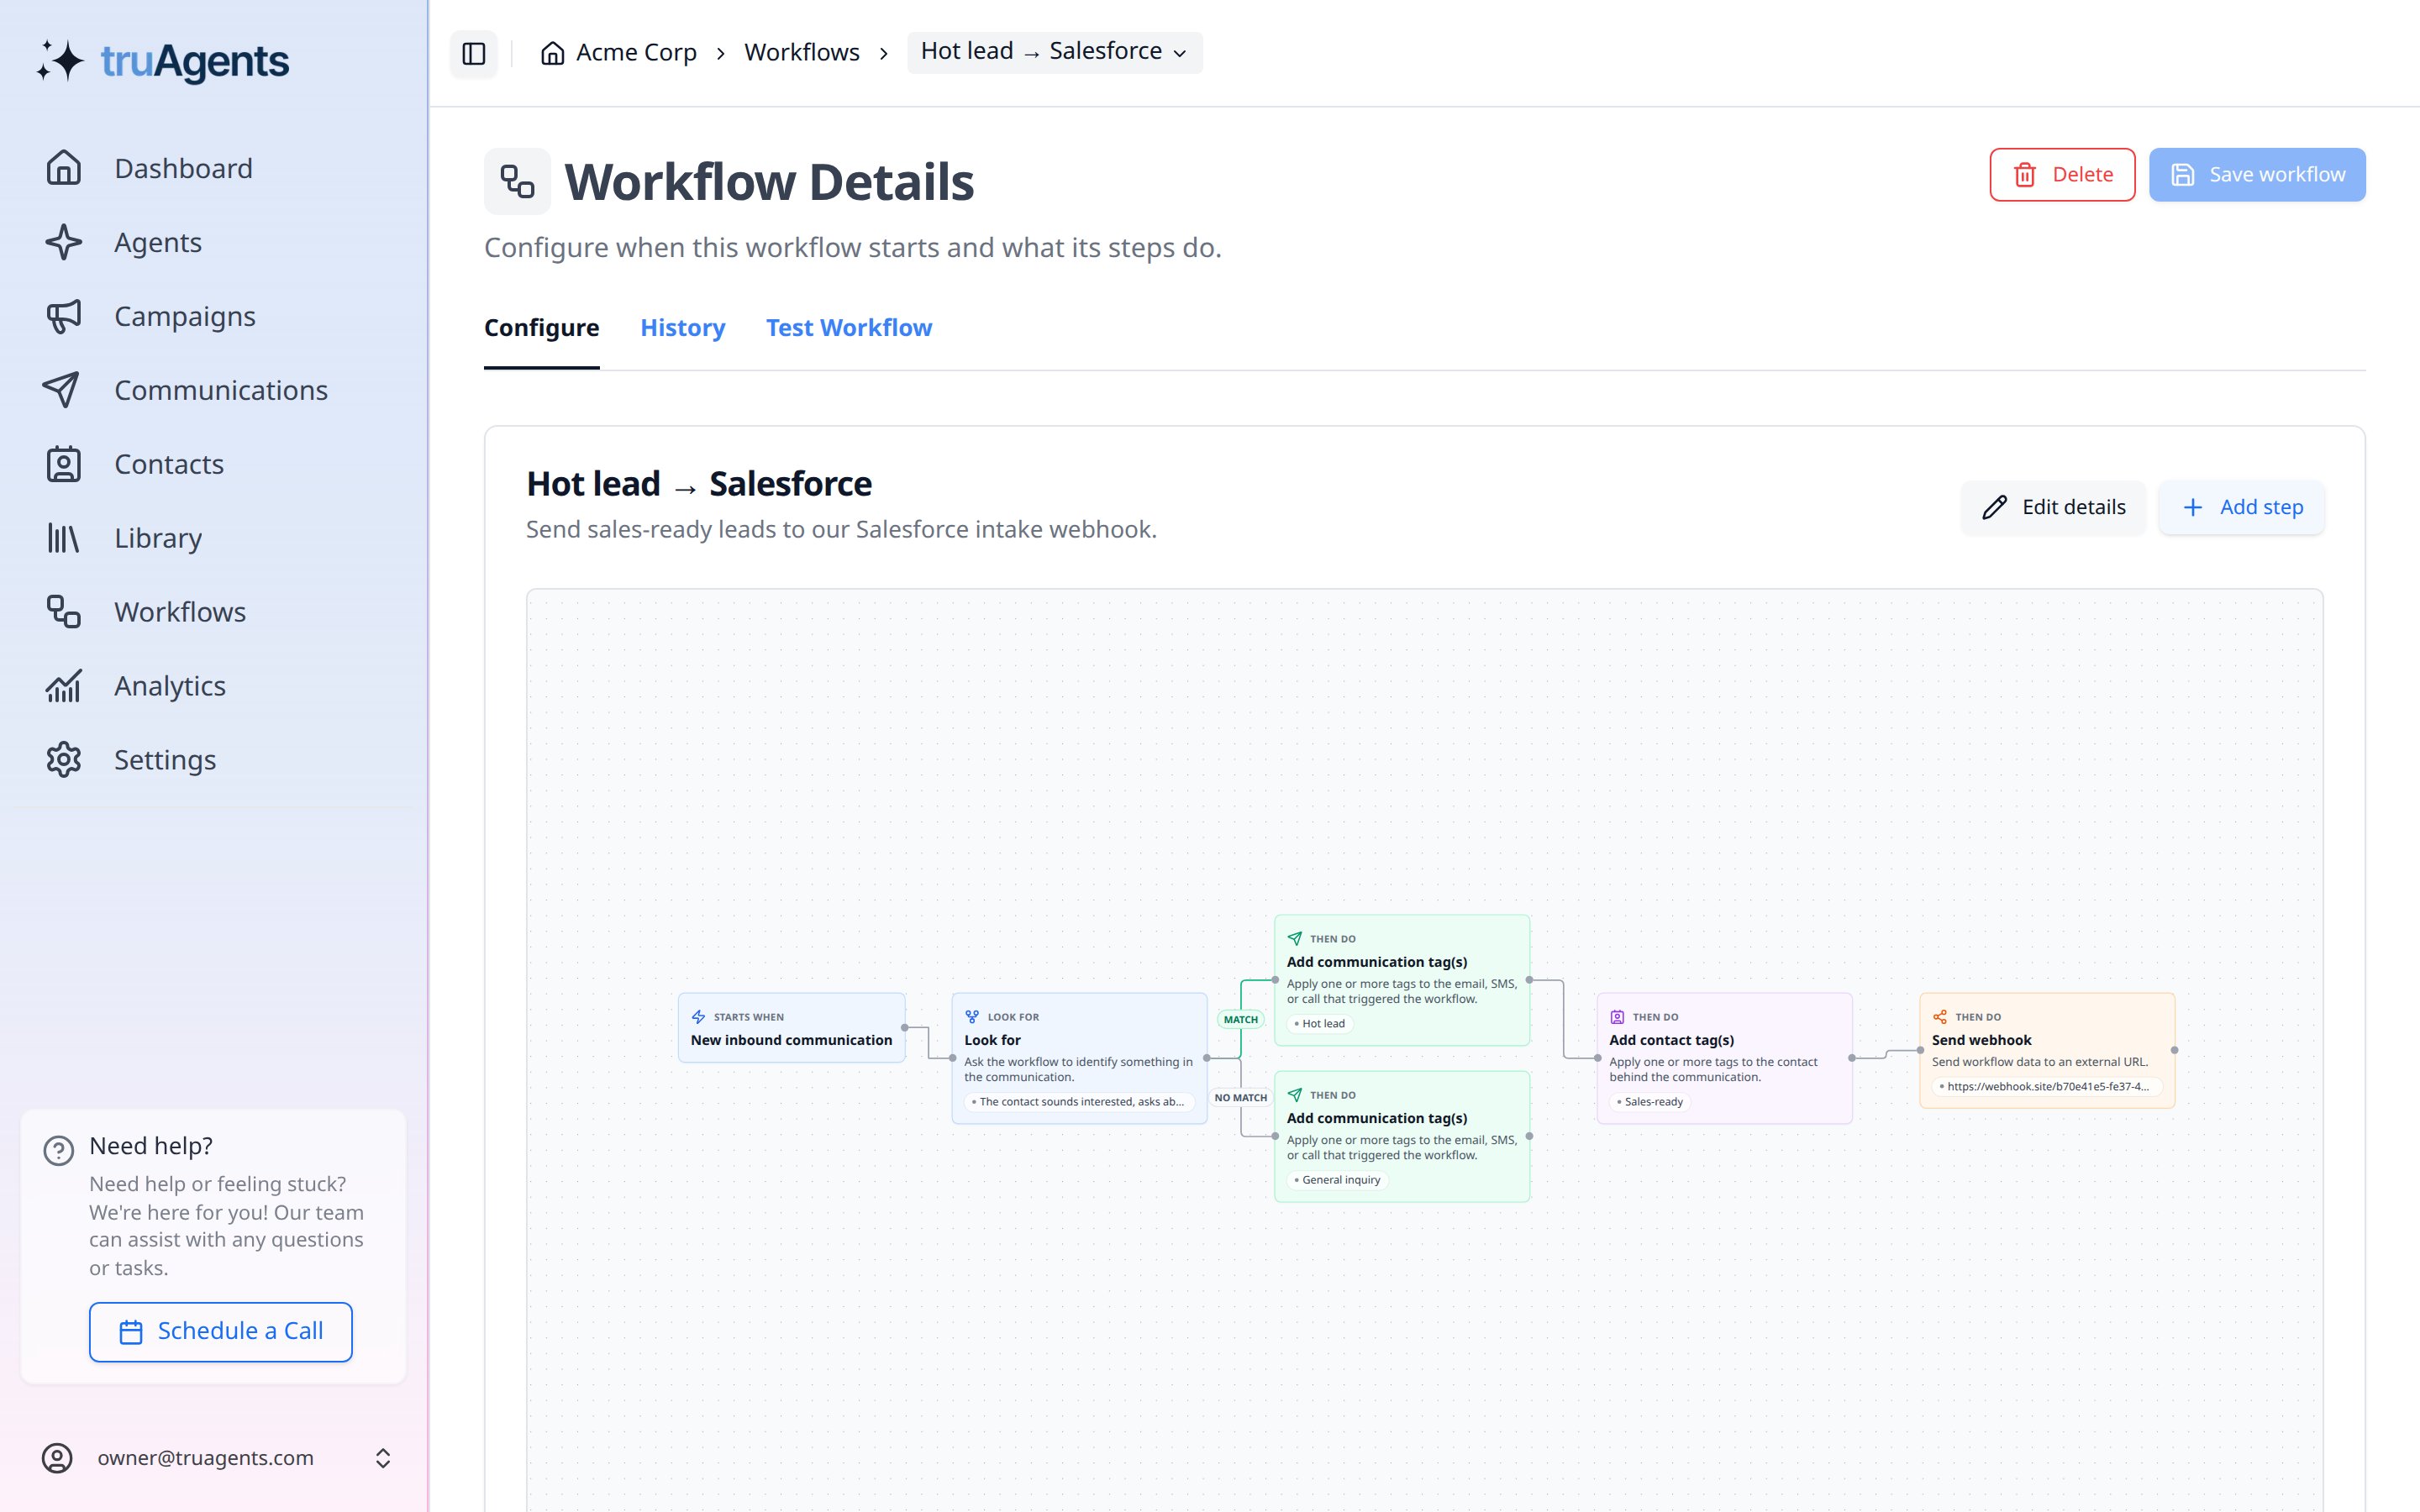
Test without sending
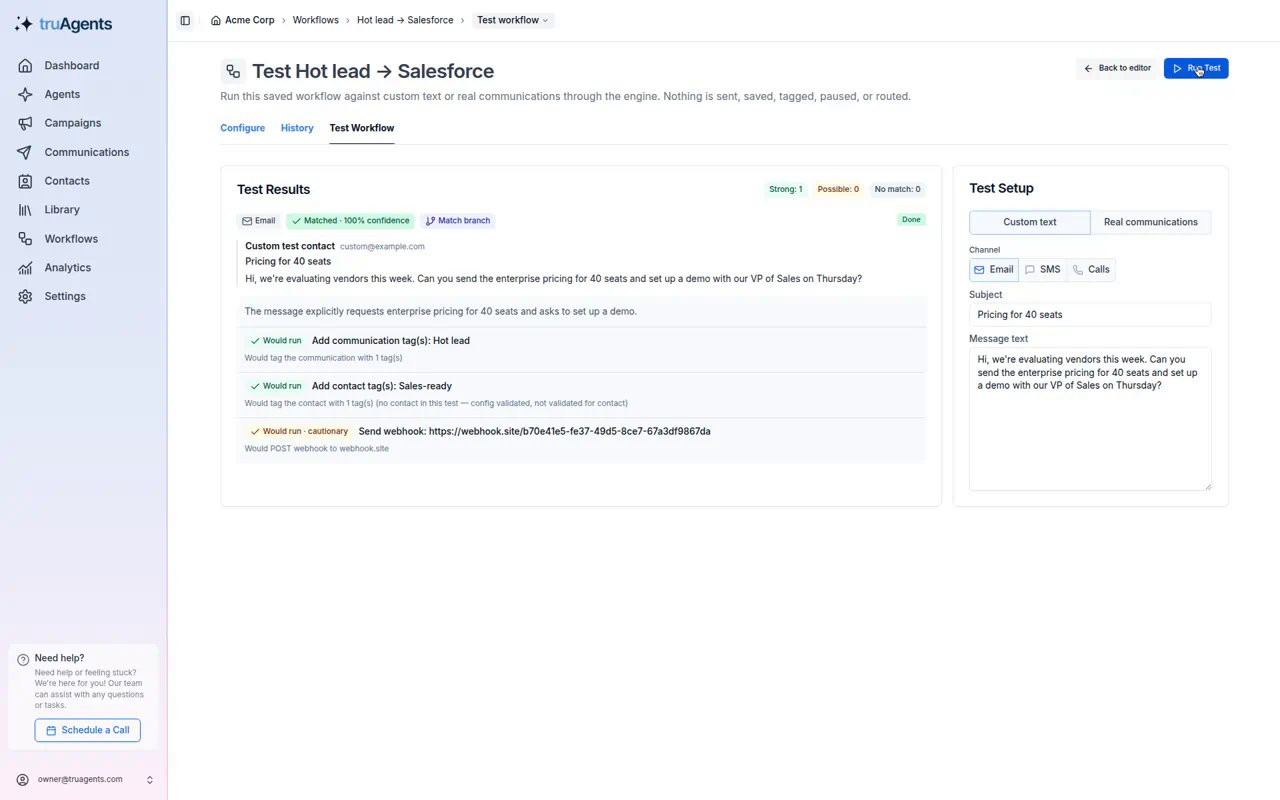
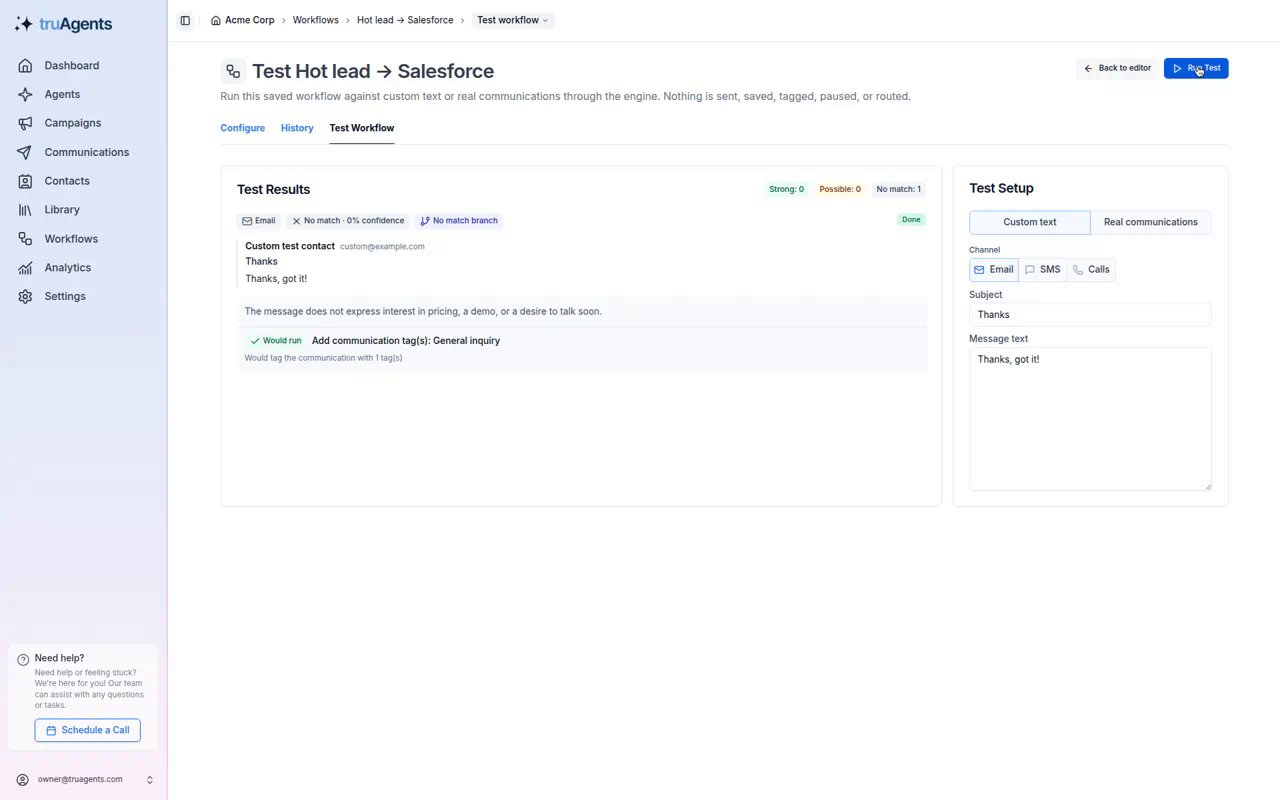
Open the Test Workflow tab, write or pick a sample communication, and click Run Test. Tests never send anything: the webhook step shows Would run and “Would POST webhook to<host>”, but no request is made.
Test both sides:
-
a message that should match. The webhook step appears on the result.
-
a message that shouldn’t match. The webhook step doesn’t appear.
To see a real request before your receiver is ready, point the step at a request inspector such as webhook.site, then send a test email to your TruAgents inbox. Switch to the real URL afterwards. Don’t use an inspector with real customer data.
Go live
- On the Workflows list, set the workflow to Active. Inactive workflows never run.
- Wait for a real communication, or send one yourself.
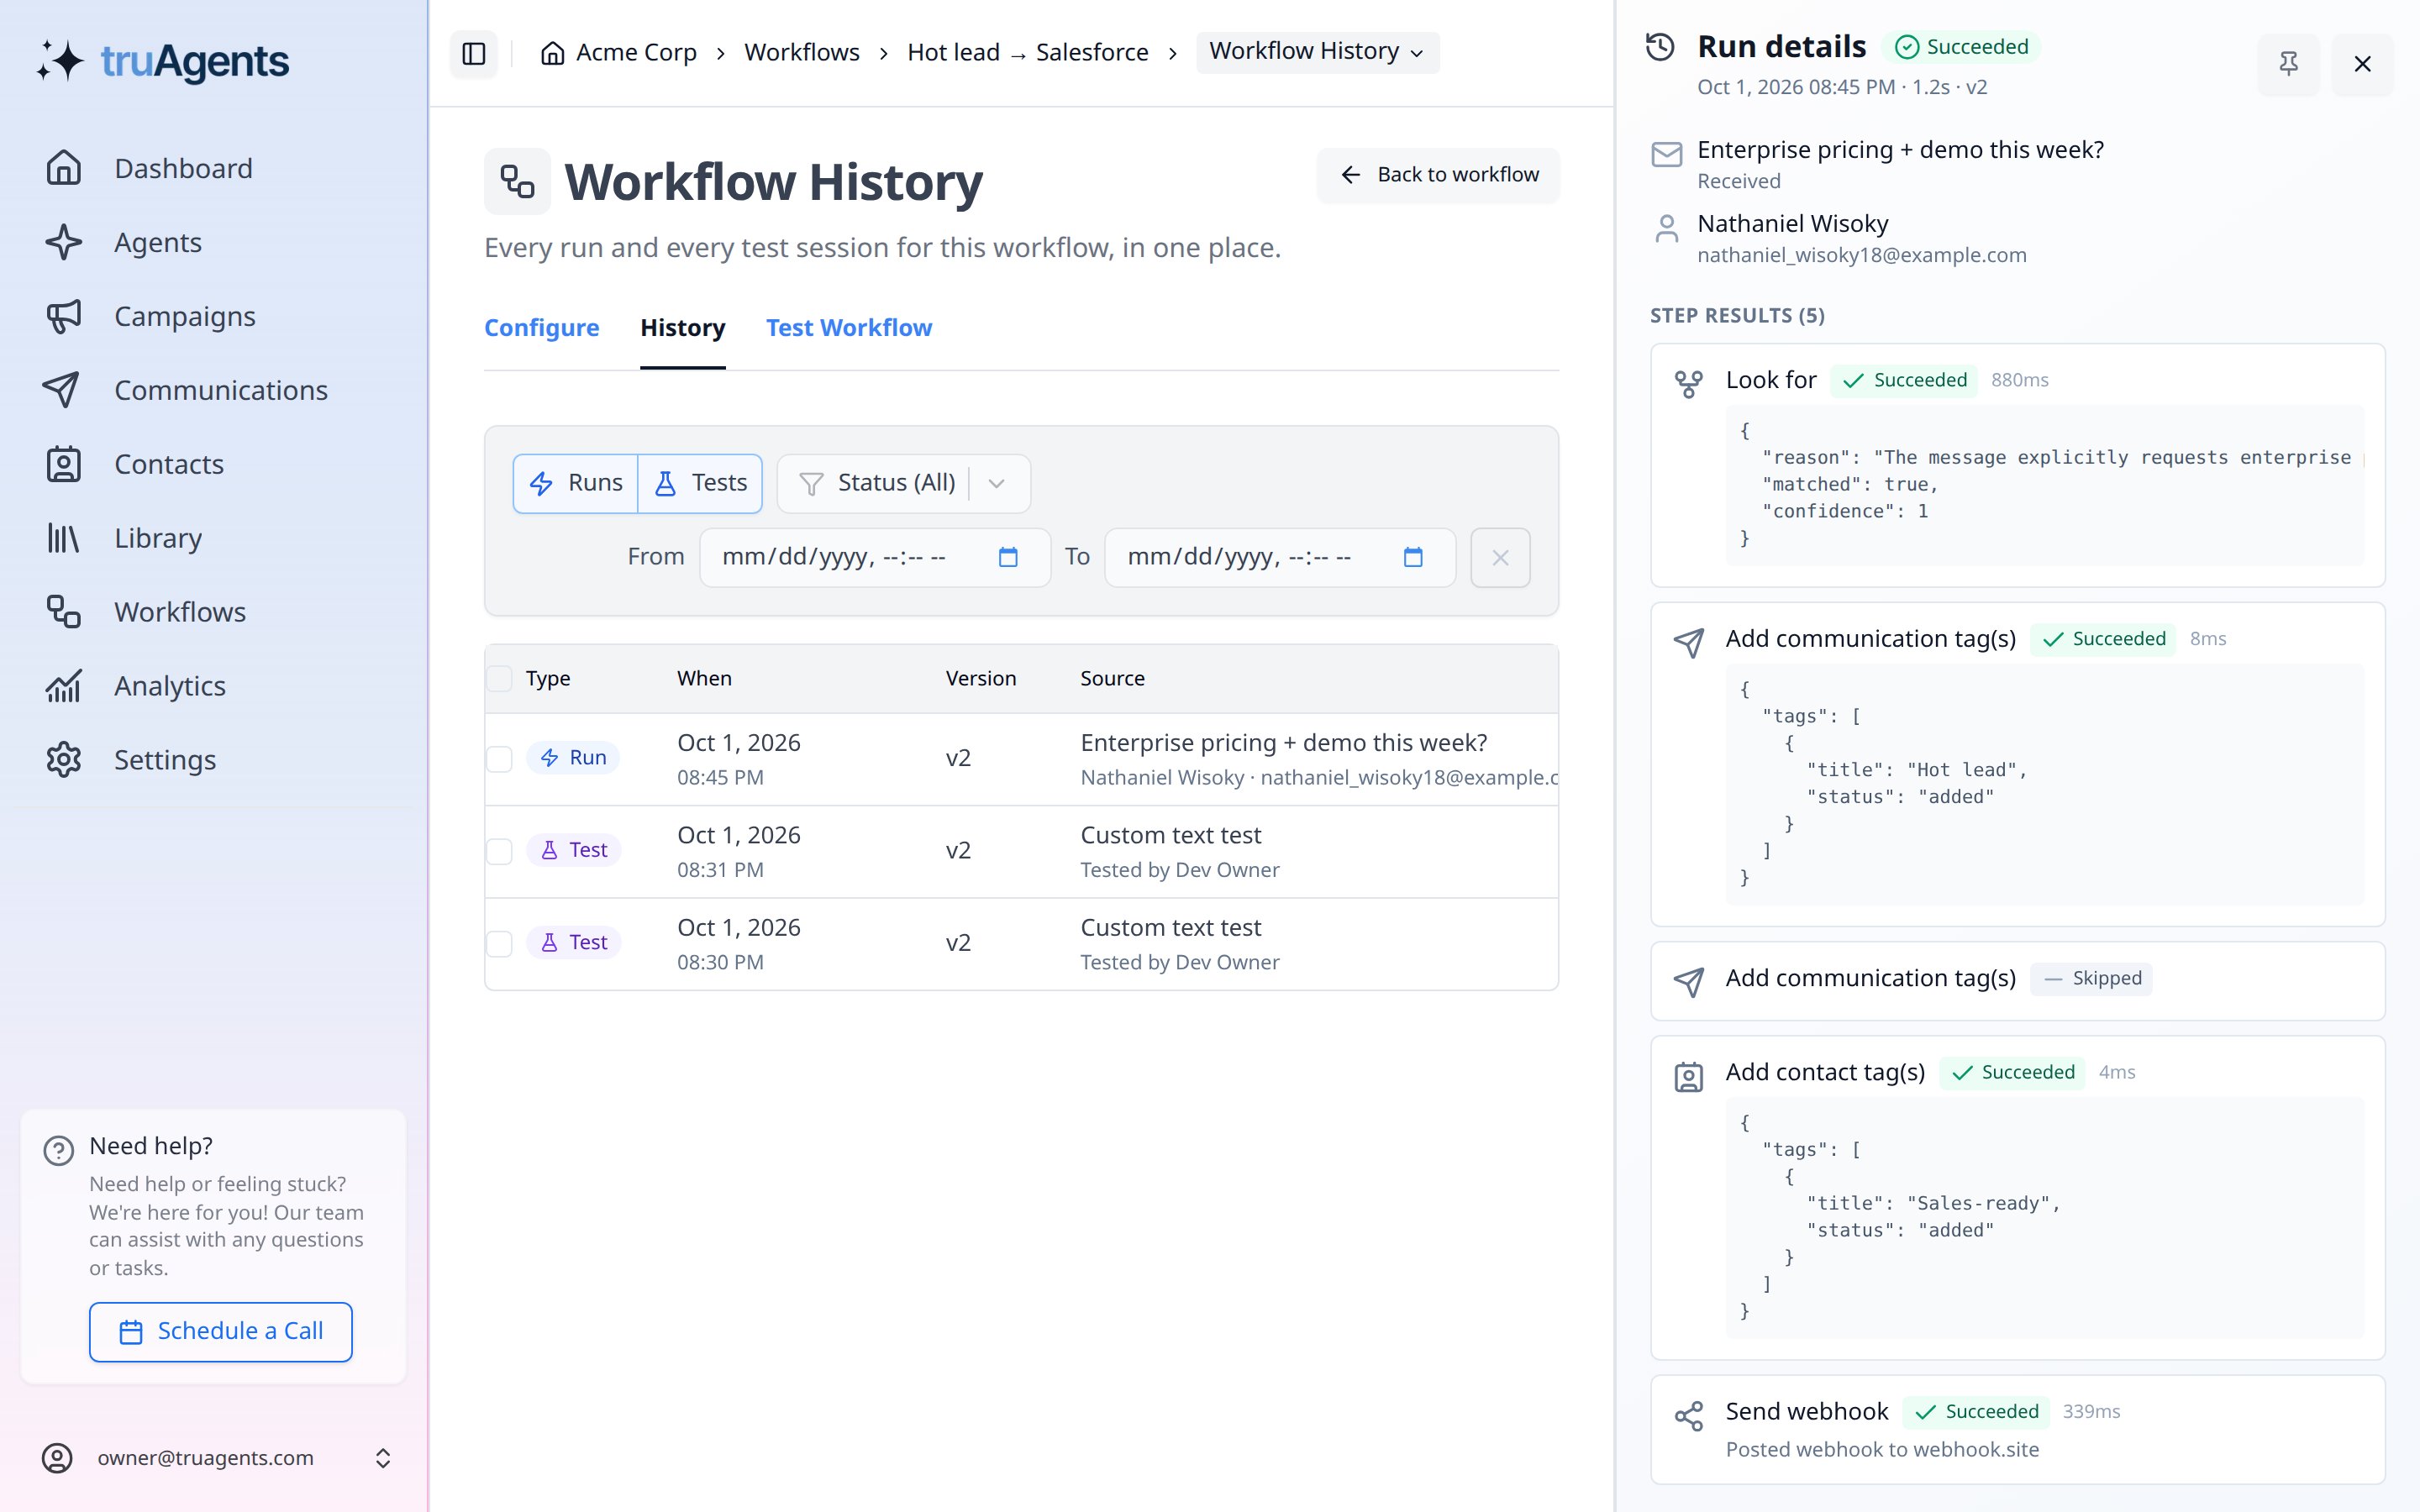
- Open History and click the run. The Send webhook step shows Succeeded with “Posted webhook to
<host>”.
If something goes wrong
Success checklist
- The endpoint URL is
https://and public. - No header contains a password or a credential for another system.
- A matching test shows “Would POST webhook to
<host>”, and a non-matching test doesn’t. - The workflow is Active.
- A real run shows Succeeded on the Send webhook step, and the record arrived in the destination.
Related pages
- Send hot leads to Salesforce, with guides for a relay, Zapier, and Make
- Webhooks reference
- Workflow automations overview