Summary
Email setup is one of the most operationally sensitive areas in TruAgents. The current app strongly suggests that email setup includes both:- outbound sending configuration and domain authentication
- inbound email handling through forwarding or mailbox access
Who this is for
- Owners and admins
- Technical operators responsible for delivery and inbox setup
- Internal teammates helping customers validate email readiness
Where to find it in the app
- Settings → Email
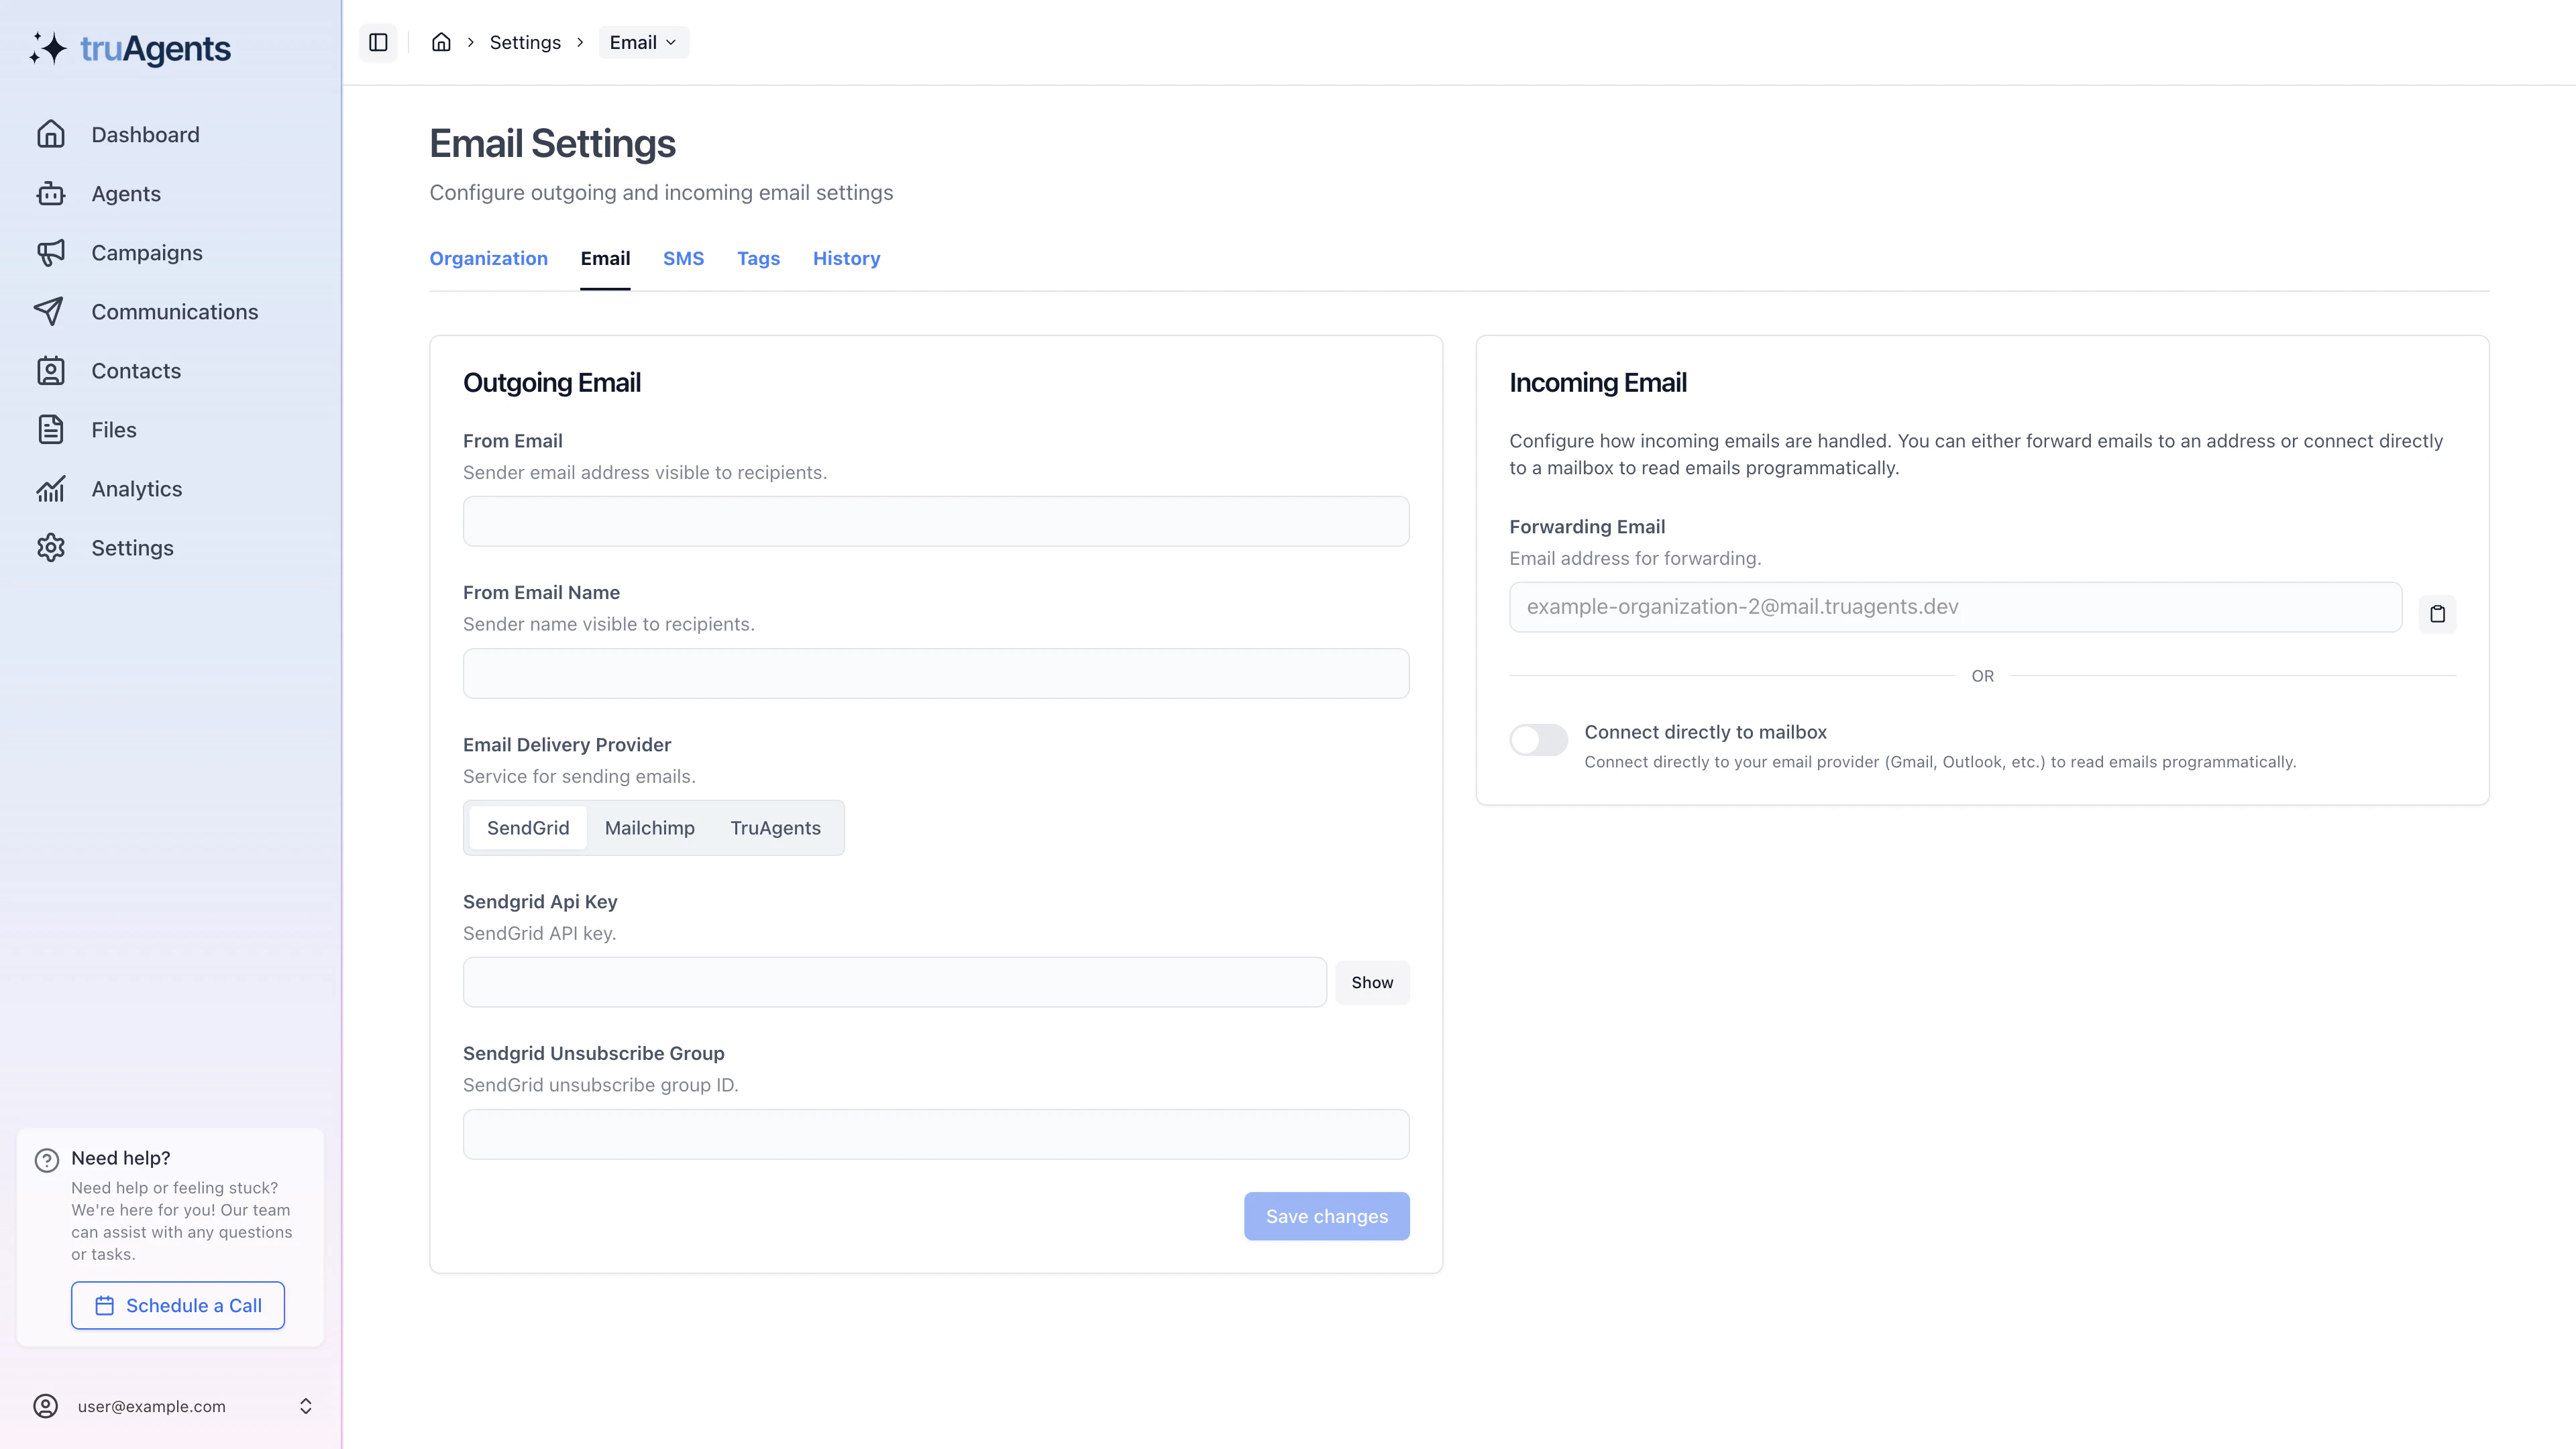
What this area appears to cover
Outbound domain authentication
The app includes a domain-authentication flow with DNS records and verification behavior. That means the docs should explain:- what domain is being authenticated
- which DNS records need to be added
- why verification can take time
- how users know whether setup succeeded or failed
Inbound email handling
The app also supports incoming email configuration. The current UI suggests two broad approaches:- forwarding email into TruAgents
- connecting directly to a mailbox
Ongoing verification and troubleshooting
This page should eventually help users diagnose cases where DNS is incomplete, validation fails, or the sending setup is not ready yet.What the settings surface implies operationally
This is not just a provider-credentials page. The current settings flow suggests admins are making decisions about:- which provider path is active
- which sending domain the workspace should trust
- whether inbound email should use forwarding or direct mailbox access
- how much operational complexity the team is willing to own
Example decision: forwarding vs mailbox access
Recommended implementation order for customers
- Open Settings → Email.
- Configure outbound domain details first.
- Add the required DNS records.
- Wait for propagation and run verification.
- Decide how inbound email should be handled.
- Validate that the team understands which email path is now active.
Outbound first, inbound second
That order matters. Teams often want to configure everything at once, but the safer path is:- make outbound sending trustworthy
- confirm verification status
- then decide how replies will be handled
What “ready enough for first launch” means
- the sending domain has been configured
- required DNS records have been added
- the team can explain the current verification status
- inbound handling has been chosen intentionally, even if it is still basic
Common mistakes
- mixing up sending-domain verification with inbound mailbox setup
- assuming one successful save means email is fully ready
- choosing inbound mode without deciding who will operate it
- diagnosing campaign issues before confirming email readiness
- expecting DNS-based verification to complete instantly
If verification is not finishing
Start with the boring checks first:- confirm the DNS records were added to the correct domain
- confirm the host/name and value fields were copied exactly
- allow realistic time for propagation
- verify whether the team is mixing up outbound authentication and inbound handling as if they are the same step
Success checklist
- The sending domain is configured correctly.
- DNS records have been added and validated.
- The team understands whether inbound handling uses forwarding or direct mailbox access.
- The workspace is ready for campaign-related email activity without relying on placeholder setup.
High-priority details to add later
- Exact DNS record examples and screenshots
- Expected statuses and what each one means
- How forwarding differs operationally from direct mailbox access
- What happens when verification fails or stalls