

Summary
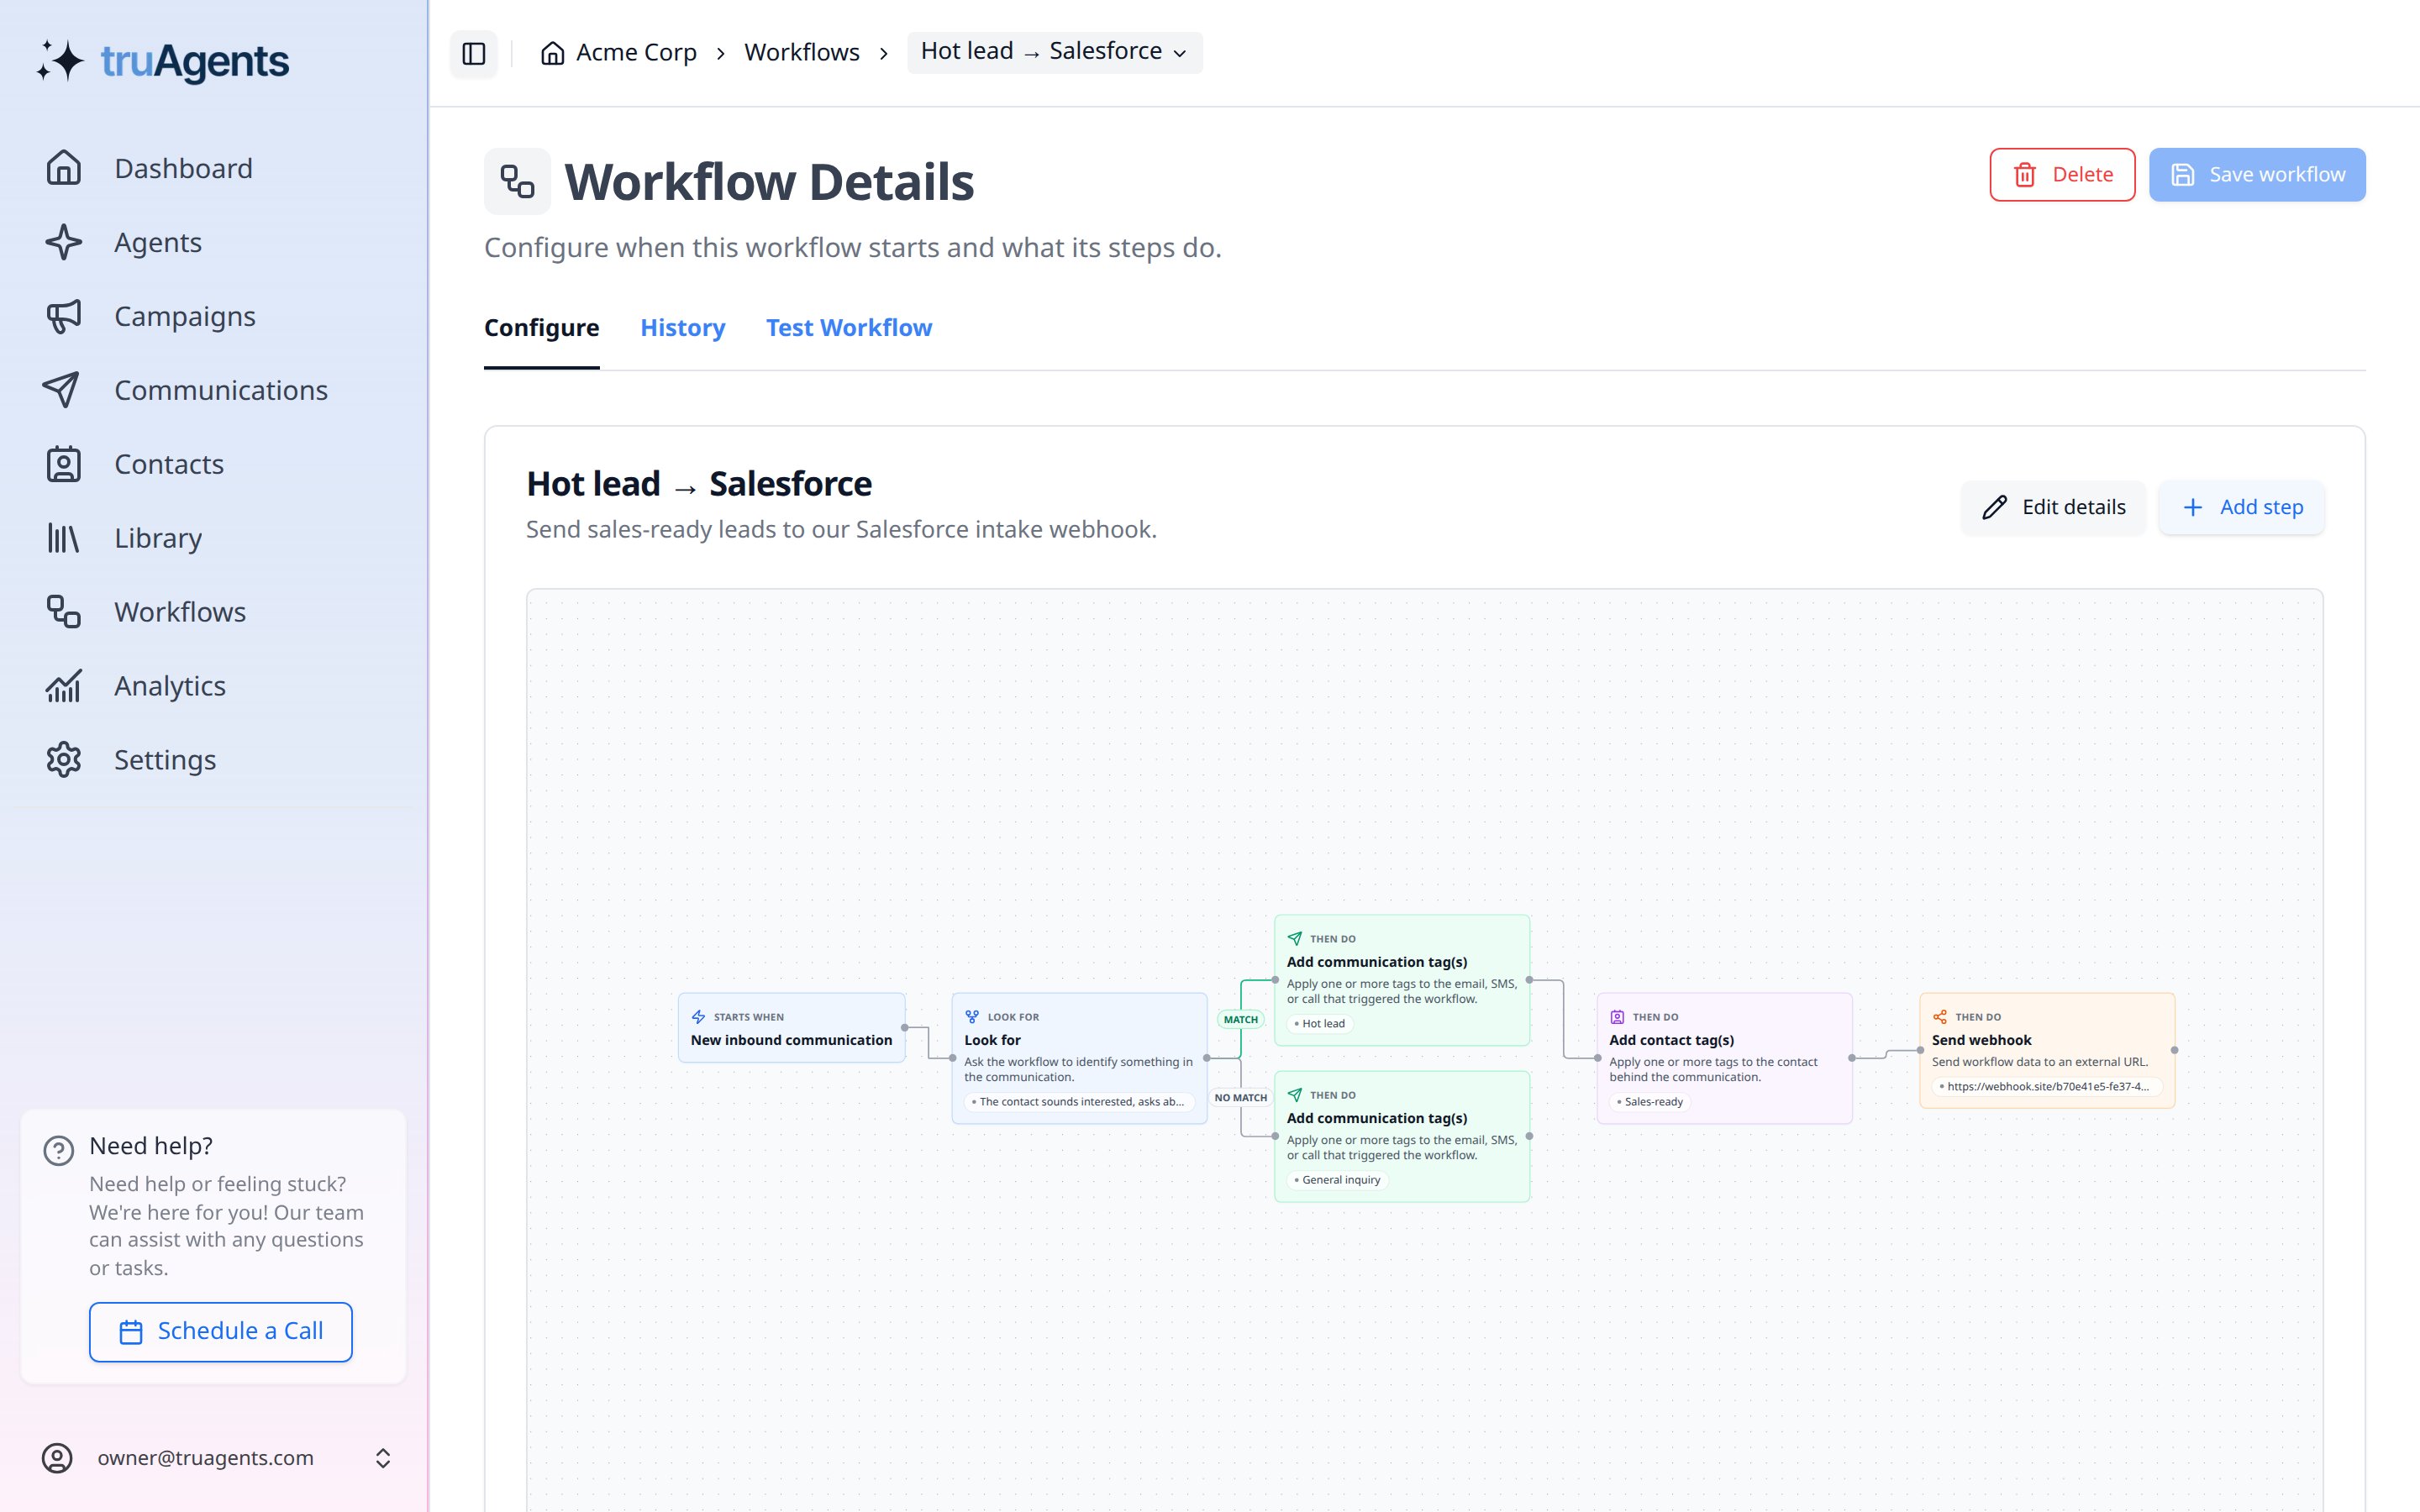
When a contact replies with buying intent, for example asking for pricing or a demo, a TruAgents workflow can tag them as a hot lead and send them to Salesforce as a Lead. How it works:- A Look for step decides whether the message is a hot lead.
- On the MATCH branch, tag steps mark the communication and contact.
- A Send webhook step sends the contact and the message to a receiver.
- The receiver creates or updates the Lead in Salesforce.
Your own relay
A small HTTPS service your developer hosts. Full control, no third-party tool, and TruAgents retries when Salesforce is down.
Zapier
No code. A Zap catches the webhook and finds or creates the Lead.
Make
No code, more control over branching. A scenario creates or updates the Lead.
Who this is for
TruAgents admins working with their Salesforce admin, and the developer or ops person who builds the receiver.Step 1: build the workflow in TruAgents
- Go to Workflows, click + Add Workflow, and pick the Hot lead starter.
- Rename it, for example “Hot lead → Salesforce”.
- Click the Look for step and adjust the instructions to match what a hot lead means for you. For example: “The contact sounds interested, asks about pricing, asks for a demo, or wants to talk soon.”
- On the MATCH branch, after the tag steps, add Send webhook. You’ll paste the receiver’s URL in step 2.
- Click Save workflow. Leave the workflow inactive until the receiver is ready.
Step 2: build the receiver
What Salesforce needs
A Salesforce Lead requires Last Name and Company. TruAgents sends the contact’s full name as one value and no company name, so every guide derives them the same way:
The full list of webhook fields is in the Webhooks reference.
TruAgents can deliver the same event more than once, and the same person can send several hot messages. Always find or update the Lead instead of always creating one.
Follow your receiver’s guide
Each guide ends with the receiver’s URL (and, for the relay, a token header) to paste into the Send webhook step.Step 3: test and go live
- On the Test Workflow tab, run a hot-lead message and a neutral message. Only the hot one should show “Would POST webhook to
<host>”. Tests don’t send anything. - Set the workflow to Active on the Workflows list.
- From a test address, email your TruAgents inbox a hot-lead message, for example: “We’re evaluating vendors this week. Can you send enterprise pricing for 40 seats and set up a demo on Thursday?”
- In TruAgents, open the workflow’s History tab. The run should show the Send webhook step as Succeeded.
- Check that the receiver got the request: your relay’s logs, Zap history, or the scenario’s History in Make.
- In Salesforce, find the Lead by email. Check the name, company, Lead Source, Rating, and the conversation link in Description.
- Send a second hot message from the same address. Salesforce should still have one Lead for that address. With the relay or Make, that Lead is updated. With Zapier, the existing Lead is found and not duplicated, but it is not updated. Add the optional Task step if you want the new message logged on the Lead.
Success checklist
- Hot-lead tests reach the webhook step, and neutral tests don’t.
- No header on the Send webhook step contains Salesforce credentials.
- A real hot-lead email creates one Lead with Last Name, Company, Email, and the conversation link.
- A second message from the same contact does not create a second Lead. With the relay or Make, it updates that Lead. With Zapier, it finds the Lead and adds a Task only if you configured that step.
- Someone gets notified when the relay, Zap, or scenario fails.
Related pages
- Send webhook step
- Webhooks reference
- Salesforce integration: importing contacts from Salesforce into TruAgents.